
Table of Contents
- Video to Demonstrate Technique
- Understand a few image editing tools
- Grab an image (bigger than needed)
- Cut and/or stretch image to size
- Add appropriate text
- Style the text
- Save the image as a template
- Save the image in a compressed format (jpg or webp)
- Upload the image with the text of your post
Video to Demonstrate Technique
The purpose here is to make a very basic but engaging image by using a minimum of graphic tools. The header image for this post is complicated–in fact much more than necessary for the majority of posts that writers need. Spend time writing, not making images!
What follows is the same material as was just seen in the video but described in writing. Skip this if you followed the video without difficulty.
Understand a few image editing tools
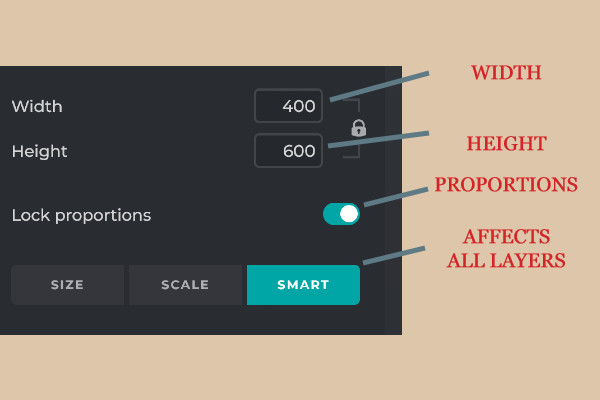
Most image editors have similar tools. The following are from Pixlr E. The first image is of the left-side toolbar. The second image is obtained from the horizontal top menu item “Page” selection.
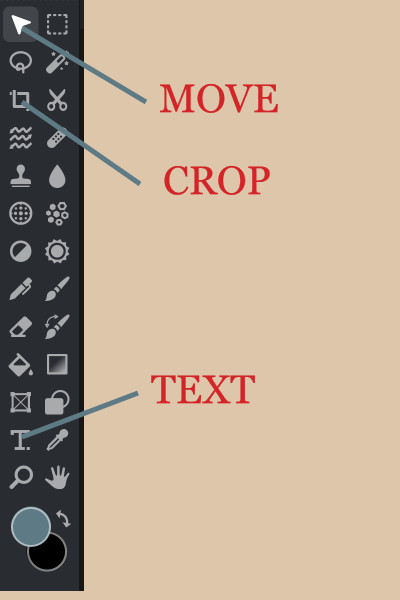
Toolbar: MOVE (allows an image element to be dragged with the mouse), CROP (sets up a rectangle. Tapping “enter” chops off the element outside the rectangle), and TEXT (opens a box for typing and allows changing font, color, size and styling).
Page sizing: When the proportions are locked, the WIDTH and HEIGHT change the image size proportionally. When the proportions are not locked, the WIDTH and HEIGHT stretch the image to match the selection. Stretching is usually not desirable because square things become rectangles and round things become oblong. However, stretching an abstract image still results in a abstract image.
Grab an image (bigger than needed)
Web-safe images are those that are not copyright restricted, do not require attribution, and can be altered as desired (cropped, resized, recolored labeled etc.) If you can’t find an adequate image out of the millions of free web-safe images, then you could purchase images. Purchased images usually have legal constraints, read the contract carefully.
These are favorite sources for free web-safe images: Pixabay.com, Unsplash.com (easily selected within Pixlr E under Home/Images), and Pexels.com.
Cut and/or stretch image to size
CROP image and PAGE sizing are usually activated sequentially to get to an image of the right layout and size. First, CROP with “ratio” selected. The width and height boxes are filled with the desired final dimensions–then the crop window is moved around with the mouse to enclose as much of the image as possible/desired for the size constraints, followed by tapping enter. Second, PAGE width and height are set to the exact pixel dimensions, followed by clicking the “Apply” button.
When the image is at the desired size, the next step is to add text.
Add appropriate text
Click on the “T” icon for text input. Click and drag to establish a size for a text field. Enter the desired text. At the top, click on font and pick one. Click on color, pick desired color.
Style the text
Click on Format and adjust letter space and line space. Click on Style and pick one, such as shadow.
Click on arrange, looks like a pointer at the top of the tool bar (do this after entering text to avoid activating the text feature when not wanted). Move the text to final position.
Save the image as a template
In the File menu, choose Save and choose the pxz type.
Save the image in a compressed format (jpg or webp)
Again in the File menu, choose Save and choose the jpg file type and set the quality to 80% (gives excellent load speed).
Upload the image with the text of your post
If you made the image 1200x628px to serve as a Featured Image for WordPress, the file is read for upload to Media.